

The topic of deployment in Salesforce Marketing Cloud (SFMC) is interesting because there are no Sandbox instances in Marketing Cloud. No Dev, QA, Prod instances to think about deployments. Instead, they got Business Units (BUs). Don’t confuse a BU with a Sandbox. Business Unit is completely different from a Sandbox. BU is NOT a Sandbox replacement either.
Consider BU as another Production instance for your account. Business units allow you to control access to information and the sharing of information. If your business has multiple brands, you can use the hierarchical structure of business units to control your brands and information access to different brands.
Deployment Manager Tool
There were absolutely no tools to deploy from one Marketing Cloud Business Unit to other Marketing Cloud business units or enterprises until Salesforce recently introduced the Deployment Manager.
With the Deployment Manager app (available in AppExchange), you can copy the design of a data extension or a journey and deploy it to other Marketing Cloud business units or accounts. You can deploy to other BUs in the same Marketing Cloud account or other account’s BUs. You can deploy the following using Deployment Manager:
- Data Extensions
- Journeys
- Shared Data Extensions
Here’s how to play with the Deployment Manager tool.
Installation
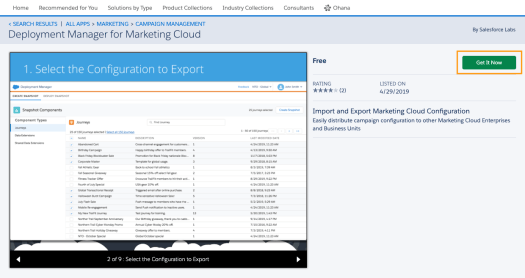
Deployment Manager is an app available in AppExchange to install in your SFMC instance. Go to appexchange.salesforce.com and search for Deployment Manager. You’d be easily able to find it – Deployment Manager for Marketing Cloud

Go the app page and click on the “Get It Now” button.
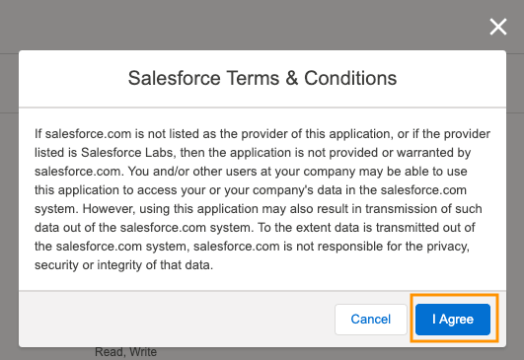
Agree to the T&Cs by checking the box and click on ‘Visit Provider’.

You’ll be asked to log in to your Marketing Cloud account. Login to the account where you want to install the app. Click on the Install button

Agree to the T&Cs again to install
Access
Once installed, go to the Access Tab. Select the users whom you want to be managing the deployment and click the ‘Save’ button.

If you want the deployment manager to be available in each of your Business Units, click the Business Units Tab on the left column and assign users accordingly.
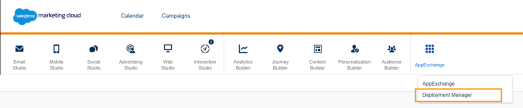
Once installed, you will be able to see “Deployment Manager” in your main navigation header under AppExchange.
Use Cases
Use Case 1 – Deploy from one marketing cloud instance to another.
In this use case, we will be deploying a Data Extension from one Marketing cloud instance (Source) to another marketing cloud instance (destination). The Deployment manager app should be installed in both instances.
Follow the installation steps mentioned above.
- Then go to Source SFMC instance, open the App. Click on the tab ‘Create Snapshot’. Go to Data Extensions, select the data extension that you want to deploy. Click on the button ‘Create Snapshot’

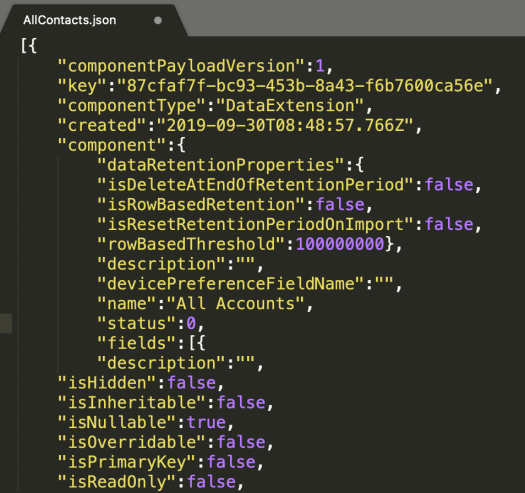
- Click on the Download button to download the json file.

- The JSON file has all the metadata of the data extension. Save the file in your system (TXT file). It has the data extension name, its properties, the field names, etc. It is recommended not to make any edits to it as you would face errors in deployment.
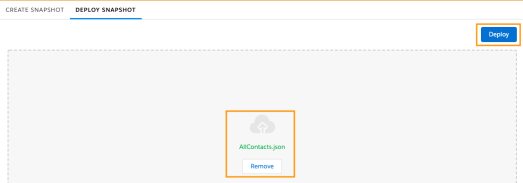
- Now you have the source file. Logout of this source marketing cloud instance. Log in to the destination marketing cloud instance. Open the app. Go to the Deploy Snapshot tab. Browse the JSON file that you just saved. Select that file from your system.

- Click on the Deploy button.
- The deployment should be done in a few seconds. A new tab now appears – “Session History”. In this, you can see the history of deployments you did in this session.
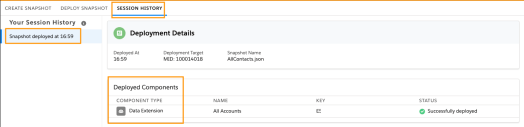
That’s it. You should see the same DE in the destination marketing cloud instance.
Use Case 2 – Deploy from one BU to another BU in the same marketing cloud instance.
In this uses case, you just need to install the Deployment Manager app only once in the marketing cloud instance. And also make sure, the access permission is set to the 2 BUs in the Access Tab of the app.

The same steps need to be followed as mentioned in Use Case 1.
- Create a snapshot of the DE from BU1. Download the JSON file and save it in your system.
- Switch to 2nd BU.
- Deploy the JSON file.
Summary
The deployment manager tool is very useful and saves a lot of time in replicating the items. However, it is limited to data extensions and journeys at the moment. Surely, the app will be updated with new features in future releases.
Encountered any issues while using the tool? Let me know in the comments. Happy to help.

It’s really a great and helpful piece of information. This helped to know few things about deployment manager tool.
Field Force help
LikeLike
Learned something new about salesforce. Thanks for Sharing
LikeLiked by 1 person
👍👍
LikeLike